Basic Usage
Once Docker is installed, you can now run a Flare Linux container. It is possible to run the container in live or test modes.
Flare Linux Live Mode
When running Flare Linux in live mode, you will run a node on the Songbird Network (Canary), or on the Flare Network.
Note
You must be whitelisted by Flare in order to connect to the live network. Please see the Flare website.
Songbird Network
Open a Bash or a ZSH terminal (Mac or Linux), or a Powershell CLI (Windows), and enter the following command in the terminal, and wait for the server to finish bootstrapping (might take some time):
$ docker run -dit --restart=always -e FLARE_BIND_ADDRESS=0.0.0.0 -p 9650:9650 --name my_flare_server asclinux/flarelinux:2.0.0-1.14.0 flare --songbird
To check the state of the ‘C’ chain, you can watch the logs of the server with this command, from inside the container:
$ docker exec -it my_flare_server /bin/bash
You will then get a command-line interface similar to this one:
Then, from inside the container:
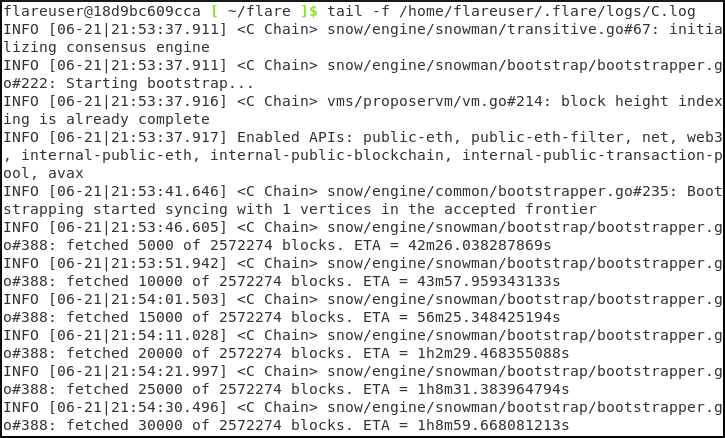
# tail -f /home/flareuser/.flare/logs/C.log
You should then see the Songbird node’s logs, like so:
If you want to run a Songbird Validator node, open a Bash or a ZSH terminal (Mac or Linux), or a Powershell CLI (Windows), and enter the following command in the terminal, and wait for the server to finish bootstrapping (might take some time):
$ docker run -dit --restart=always -e FLARE_BIND_ADDRESS=0.0.0.0 -p 9650:9650 --name my_flare_server asclinux/flarelinux:2.0.0-1.14.0 flare --songbird-validator
Note
You must have validator keys to run a validator node. Please see the Flare documentation.
Flare Network
Open a Bash or a ZSH terminal (Mac or Linux), or a Powershell CLI (Windows), and enter the following command in the terminal, and wait for the server to finish bootstrapping (might take some time):
$ docker run -dit --restart=always -e FLARE_BIND_ADDRESS=0.0.0.0 -p 9650:9650 --name my_flare_server asclinux/flarelinux:2.0.0-1.14.0 flare --flare-observer
To check the state of the ‘C’ chain, you can watch the logs of the server with this command, from inside the container:
$ docker exec -it my_flare_server /bin/bash
Then, from inside the container:
# tail -f /home/flareuser/.flare/logs/C.log
If you want to run a Flare Validator node, open a Bash or a ZSH terminal (Mac or Linux), or a Powershell CLI (Windows), and enter the following command in the terminal, and wait for the server to finish bootstrapping (might take some time):
$ docker run -dit --restart=always -e FLARE_BIND_ADDRESS=0.0.0.0 -p 9650:9650 --name my_flare_server asclinux/flarelinux:2.0.0-1.14.0 flare --flare-validator
Note
You must have validator keys to run a validator node. Please see the Flare’s website.
Flare Linux Test Mode
When running Flare Linux in test mode, you will either connect to the Coston Network 1, the Coston Network 2, or use a local test network.
Coston Network 1
Open a Bash or a ZSH terminal (Mac or Linux), or a Powershell CLI (Windows), and enter the following command in the terminal, and wait for the server to finish bootstrapping (might take a few minutes):
$ docker run -dit --restart=always -e FLARE_BIND_ADDRESS=0.0.0.0 -p 9650:9650 --name my_flare_server asclinux/flarelinux:2.0.0-1.14.0 flare --flare-coston1
To check the state of the ‘C’ chain, you can watch the logs of the server with this command from inside the container:
$ docker exec -it my_flare_server /bin/bash
Then, from inside the container:
# tail -f /home/flareuser/.flare/logs/C.log
You can also run the server in interactive mode by removing the ‘d’ option, like so:
$ docker run -it --rm -e FLARE_BIND_ADDRESS=0.0.0.0 -p 9650:9650 --name my_flare_server asclinux/flarelinux:2.0.0-1.14.0 flare --flare-coston1
Coston Network 2
Open a Bash or a ZSH terminal (Mac or Linux), or a Powershell CLI (Windows), and enter the following command in the terminal, and wait for the server to finish bootstrapping (might take a few minutes):
$ docker run -dit --restart=always -e FLARE_BIND_ADDRESS=0.0.0.0 -p 9650:9650 --name my_flare_server asclinux/flarelinux:2.0.0-1.14.0 flare --flare-coston2
To check the state of the ‘C’ chain, you can watch the logs of the server with this command from inside the container:
$ docker exec -it my_flare_server /bin/bash
Then, from inside the container:
# tail -f /home/flareuser/.flare/logs/C.log
You can also run the server in interactive mode by removing the ‘d’ option, like so:
$ docker run -it --rm -e FLARE_BIND_ADDRESS=0.0.0.0 -p 9650:9650 --name my_flare_server asclinux/flarelinux:2.0.0-1.14.0 flare --flare-coston2
Local Network
If you prefer, you can run a local Flare node, by running the following command instead:
$ docker run -it --rm -e FLARE_BIND_ADDRESS=127.0.0.1 -p 9650:9650 --name my_flare_server asclinux/flarelinux:2.0.0-1.14.0 flare
Start Testing the Flare API
Use Postman to start querying your server’s API: VIDEO TUTORIAL,
Note
Make sure the “C” chain is bootstrapped, before making other queries!
Stopping the Flare Node
To stop the Flare server, please enter the following command (or press Ctrl+C in interactive mode):
$ docker rm -f my_flare_server